


What is SOA
SOA (Service Oriented Architecture) is an approach in terms of service based application development and outcome of the application is also a service. Oracle SOA Suite is a part of Oracle Fusion Middleware Technology Stack. In SOA paradigm, each and every component is a service and can be exposed to the open worldA�as a service.A�Using differentA�adapters the interoperability of the service can be ensured by integrating applications which are provided by different vendors, based on different platform and run on different operating system. SOA is Service Component Architecture (SCA) assembly model. SCA enables SOAA�to represent business logic as reusable service components that can be easily integrated into any SCA-compliant application.
Advantages of SOA
- Loose Coupling
- Location Transparency
- Re-usability
- Better Scalability
- Cost Efficiency
Installation Steps
Before installing SOA suite 12c (12.1.3), the below mentioned software need to beA�downloaded.
Pre-requisites:
- OS windows 7 64bit
- Install Oracle 11g latest version or 12c XE database
- Install Java SE Development Kit 7u80A�as shown below.
Follow the below mentioned steps to install SOA suite 12c:
- Download FMW_12.1.3 64 Bit zip file from oracle site in local machine.
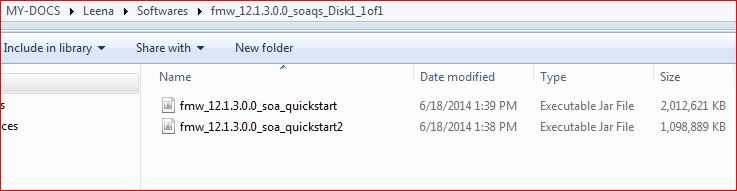
- Unzip the file and two jar files will be created.
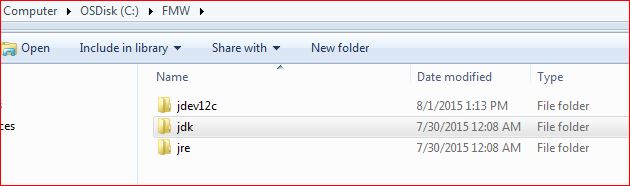
- JDK and JRE will be install in the folder which is shown in the below screenshot.
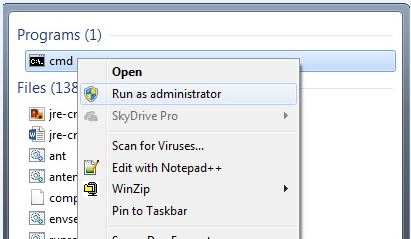
- A�Open windows command prompt as a�?Run as administratora�� privilege.
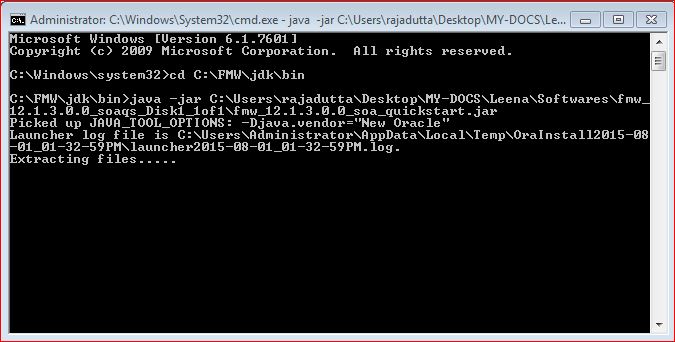
- Go to C:\FMW\JDK\bin path where JDK is installed.

- Enter the below command “A�java a��jar <location of jar file>\<jar file name with .jar extension> ” as shown in the screenshot and then press Enter
 .
. - Below wizard will open.
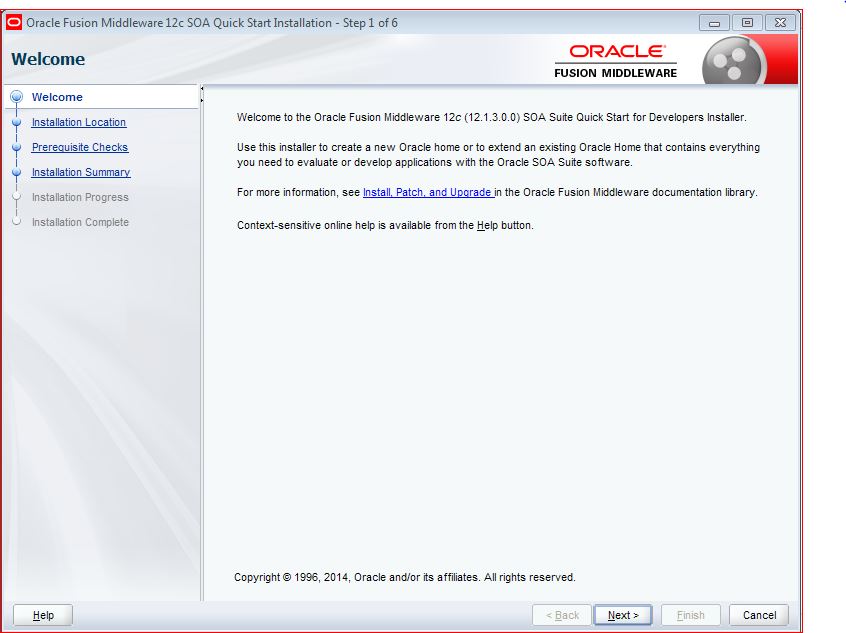
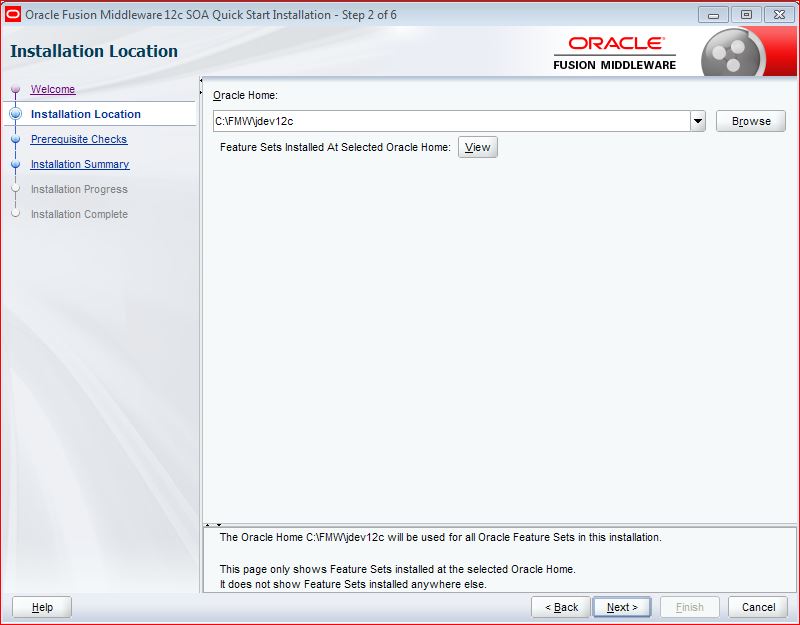
- Click on NEXT and select the Oracle Home path.In our case, it is C:\FMW\jdev12c
- Click on NEXT and the Prerequisite checks will be performed.
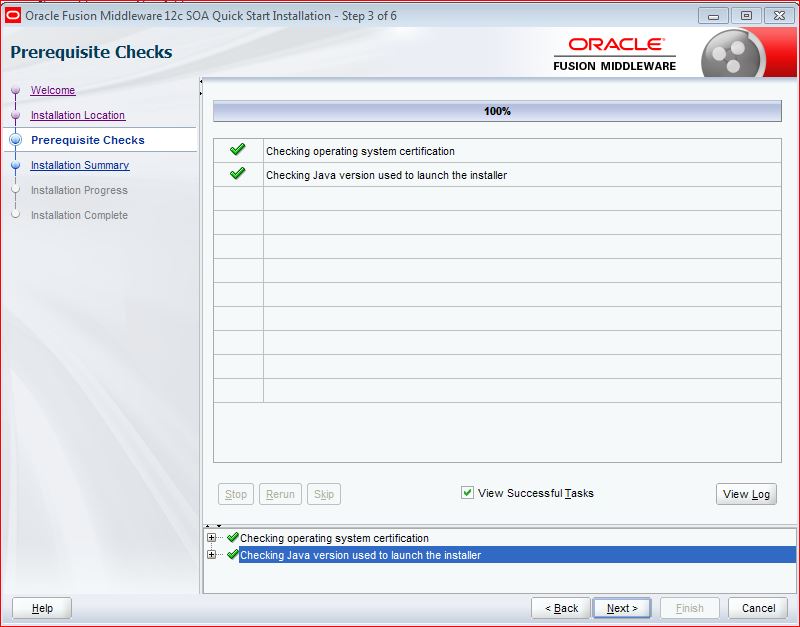
- Once it is successful, Click on NEXT and it will open Installation Summary Window.
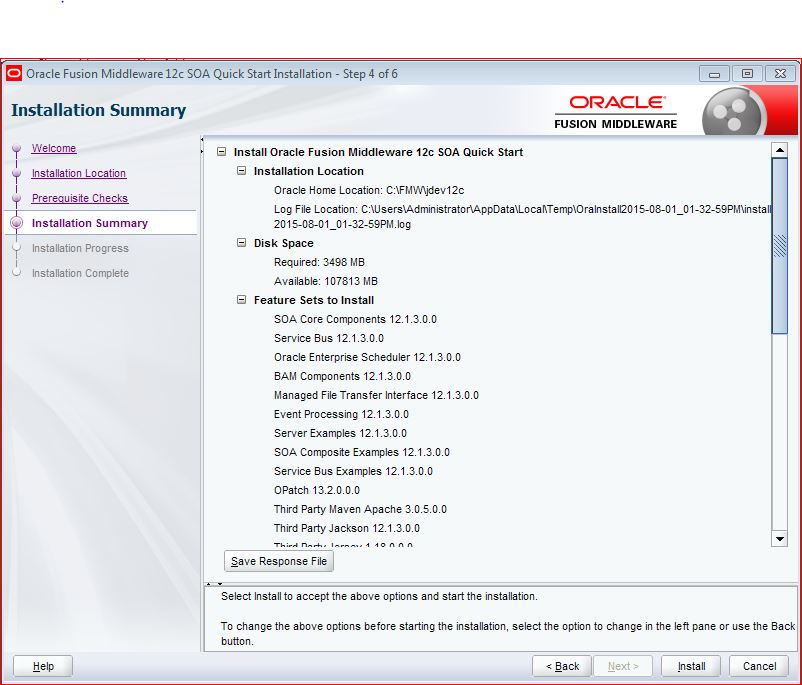
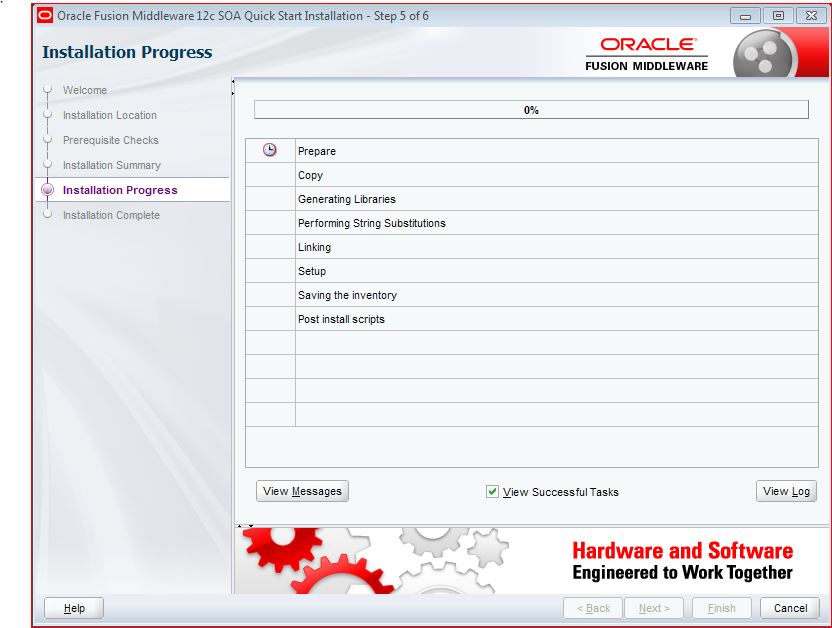
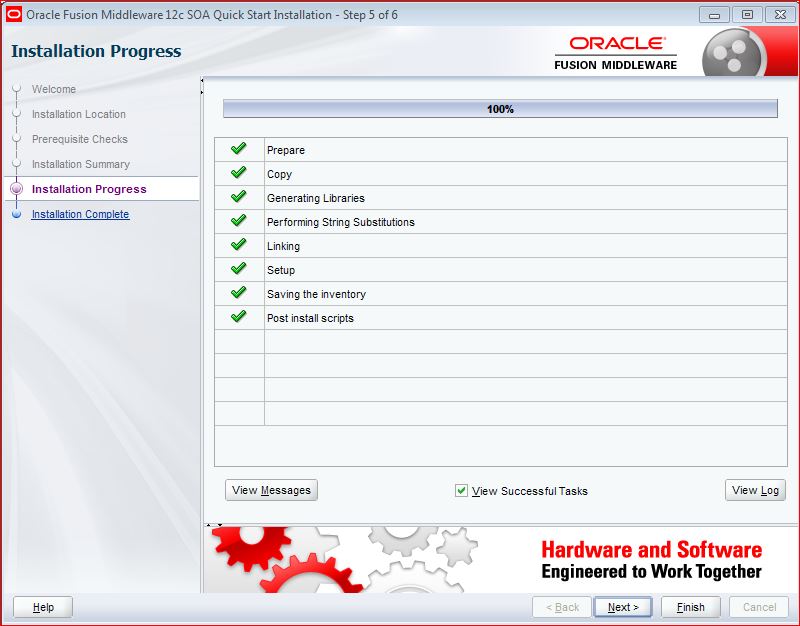
- Click NEXT and the Installation will start and progress will be shown.
- After completion of the installation process, NEXT button will be enabled and then click on NEXT
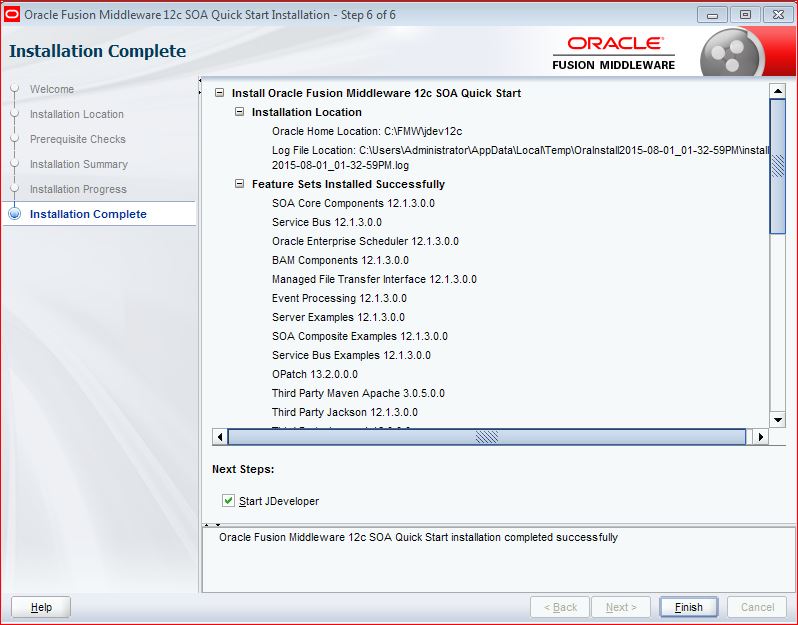
- Click on FINISH and check the ‘Start Jdeveloper’ checkbox.
- Now startA�the IntegratedWeblogicServer. Go to Run -> Server Instance
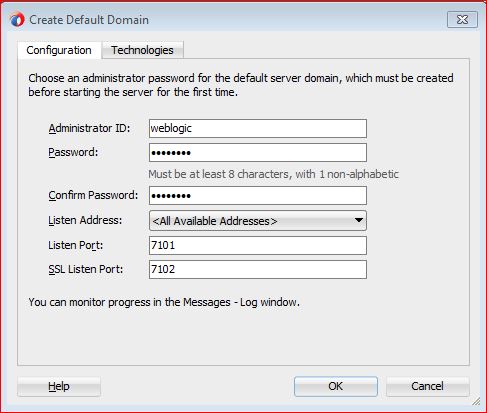
- It will prompt for Default Domain Creation. Enter ID, password, port and click on OK. Please note: This Domain configuration is a one time activity.
This is all about the installation process of Oracle SOA Suite 12c and now we can start working on developing SOA Application. Hope this article has helped you about the installation process of Oracle SOA Suite 12c.
 The Humanizer is a platform created by technology domain experts to inspire innovative, hence simple, thoughts for a better social living.


