


In previous example, we have explored enqueuing operation from database, now we will do the same operation using AQ adapter in SOA Suite 12C. First we have to create data source and outbound connection pool in admin server and then we will use it at the time of AQ adapter configuration.
Go to Services -> Data Sources -> create new generic data source. Data source name will be testAQLocalhost and JNDI name will be JNDI/testAQLocalhost. JNDI name will be used in outbound connection pool.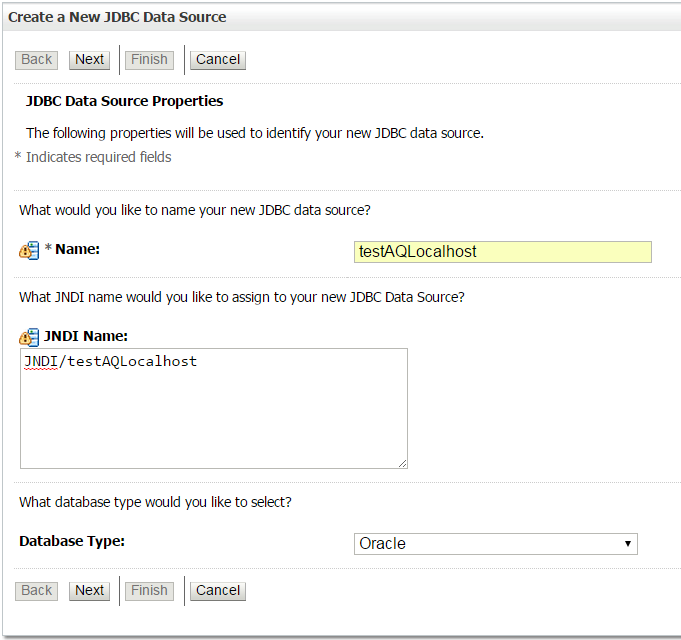
Click on next button and enter database connection details like host, port, username and password like below screenshot.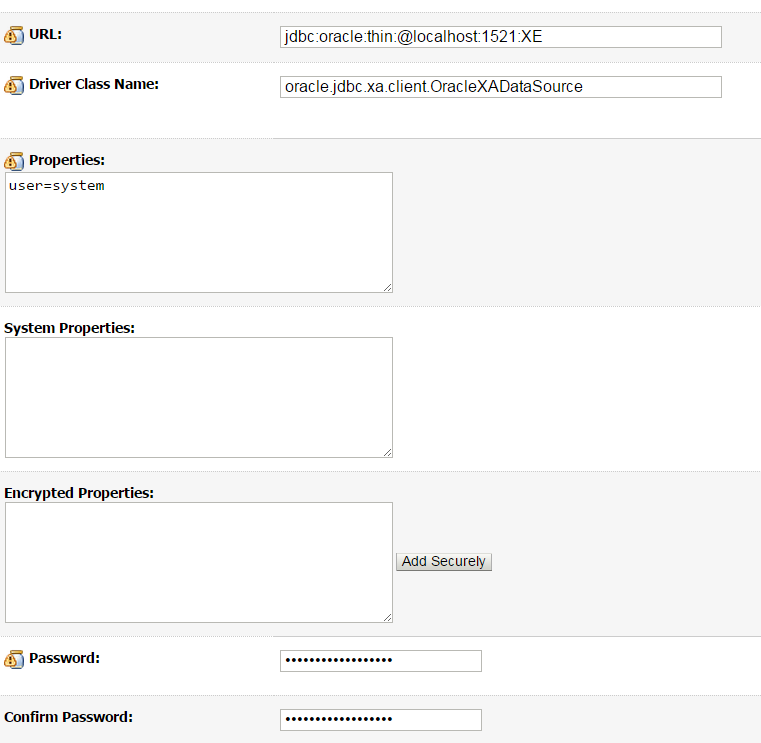
Click on Next button and select default server (your weblogic server) and then finish it.
Now create outbound connection pool for AQ adapter. Go to Deployment -> Aq Adapter -> click on New. Enter JNDI name as eis/aq/testAQLocalhost and click on Finish button. Outbound connection pool has created.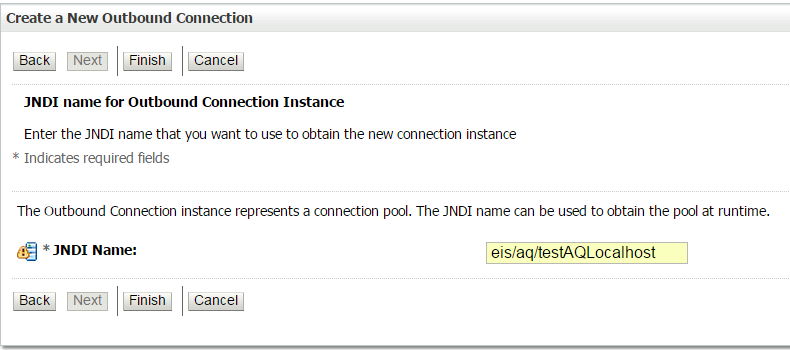
In the next step, you have to enter the JNDI name of data source in XADataSourceName field and press enter button in your keypad. Then save the details. Dona��t forget to update the Aq Adapter after the creation of connection pool which update plan.xml file. This configuration is similar to DB adapter configuration.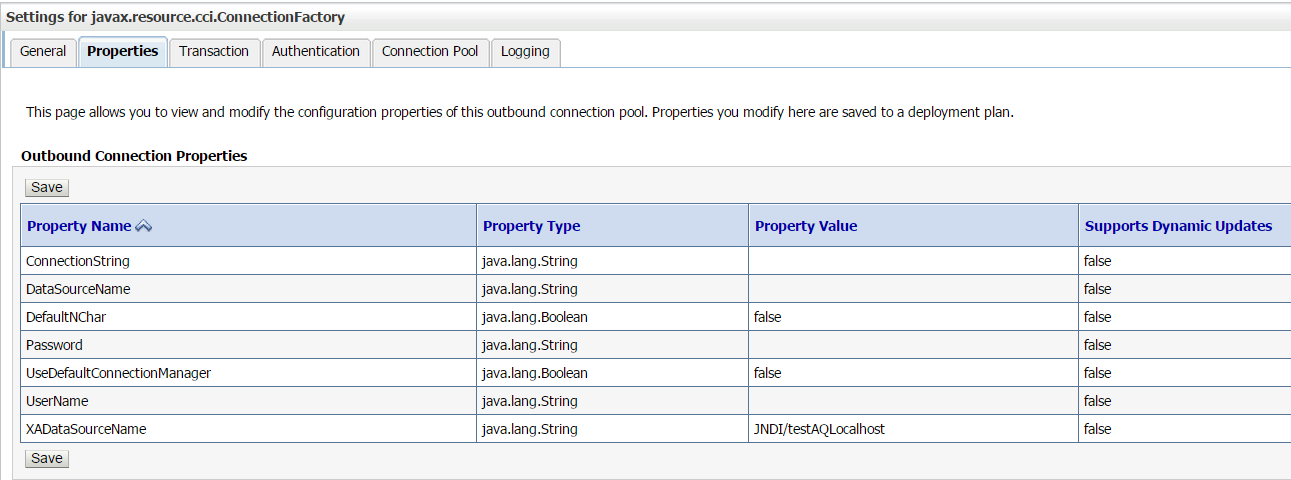
Now we will start creating project on AQ Adapter. Create a new SOA application with SOA project. Enter project name EnqueueProject and select Composite With BPEL Process in the next wizard.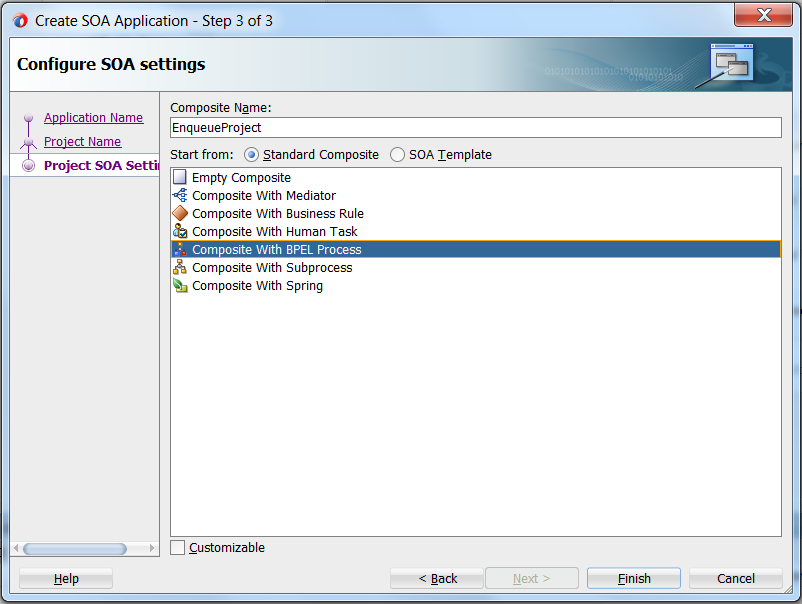
Enter BPEL process name and select Employee.xsd as both input & output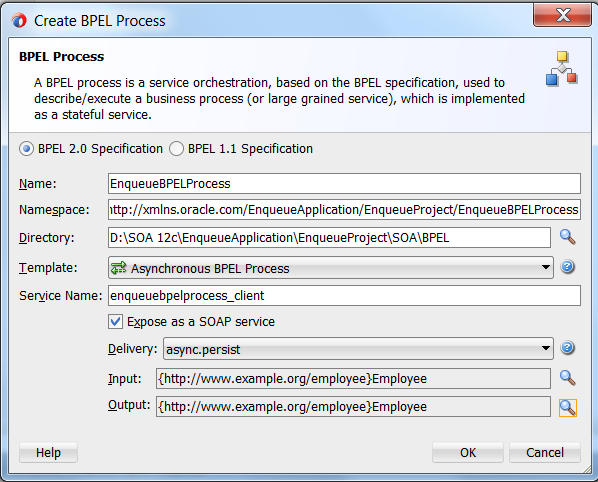
Now select AQ adapter from technology component and drag and drop it in External Reference swim lane. Enter reference name and click on next button.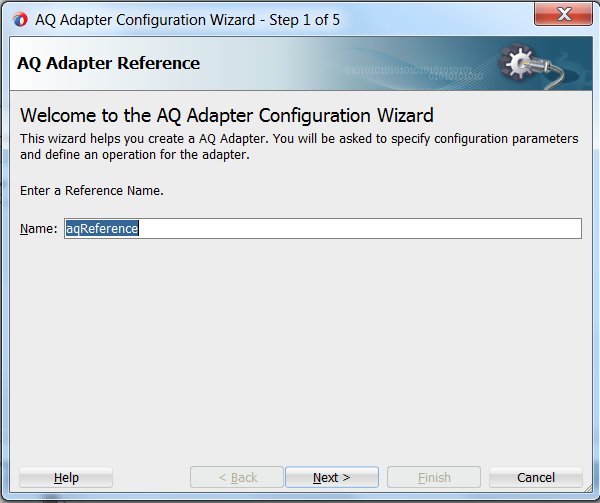
Select database connection name where queue is created and select JNDI name of AQ outbound connection pool also.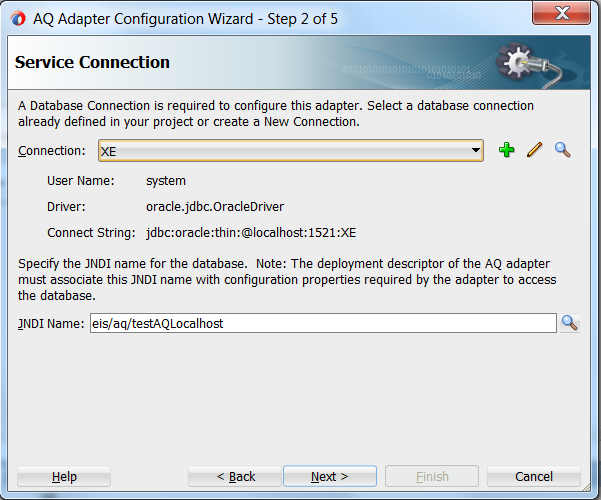
Next wizard will be the selection for schema. Select Define from operation and schema option. After that select Enqueue as operation type.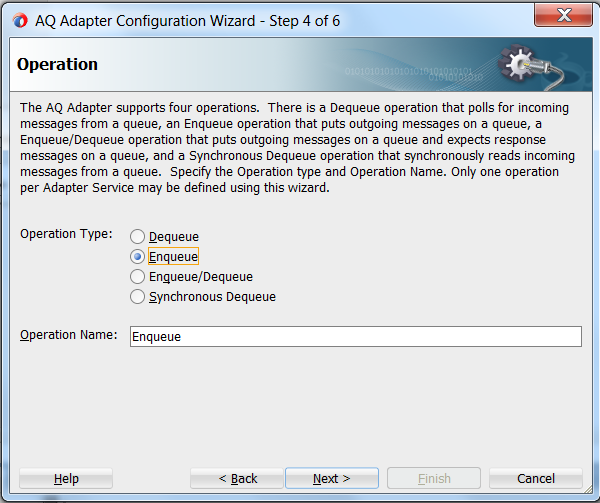
Select queue name in the next wizard. You can browse the queue name or manually enter the queue name also.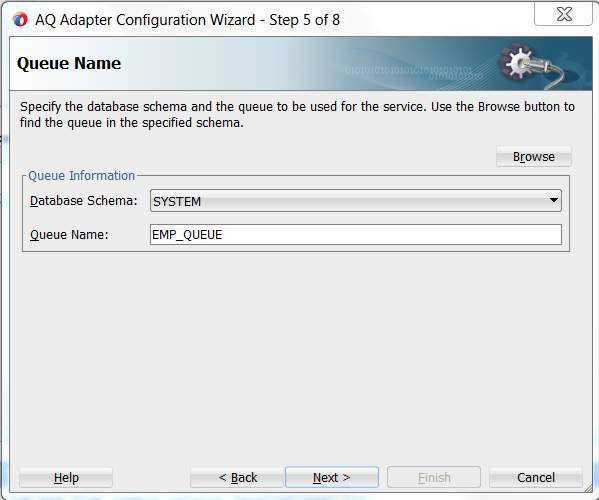
Let the correlation id be blank.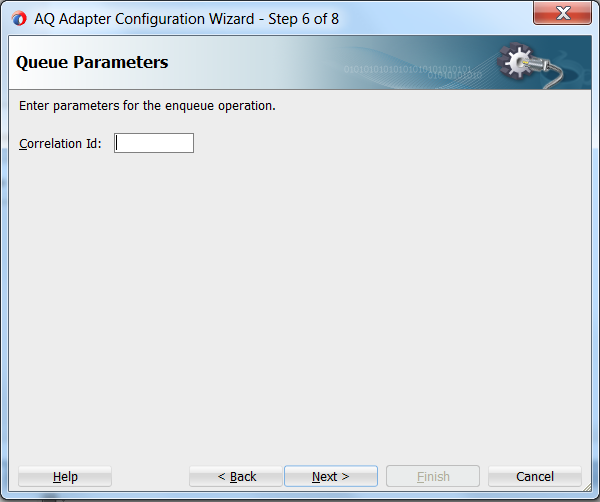
Select Whole Object EMP_MSG_TYPE option as Object Payload.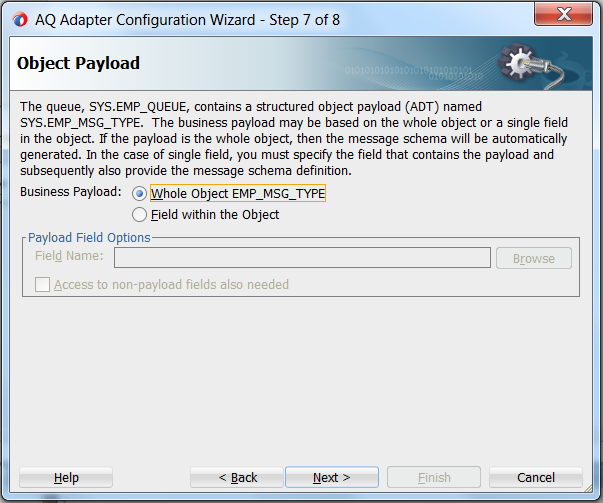
Click on next button and then finish the configuration of AQ adapter. Composite will be like below screenshot.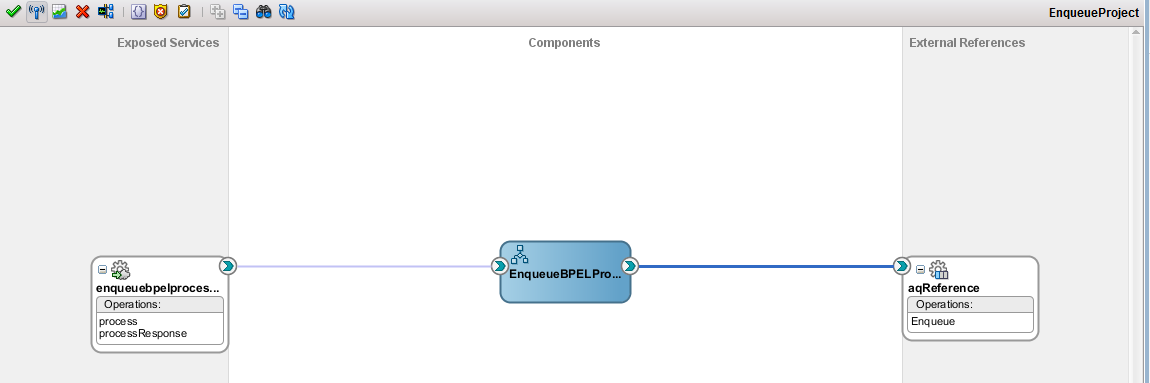
Double click on BPEL process to open it. Drag and drop INVOKE activity after receive activity. Then drag a wire from invoke activity to aqreference partner link, editor window will open. Enter invoke activity name and create input variable for invoke.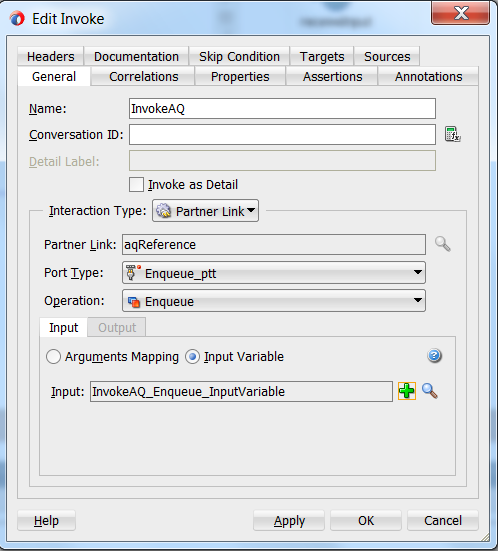
Now add an ASSIGN activity before invoke activity and map the input payload with the input variable to invoke activity.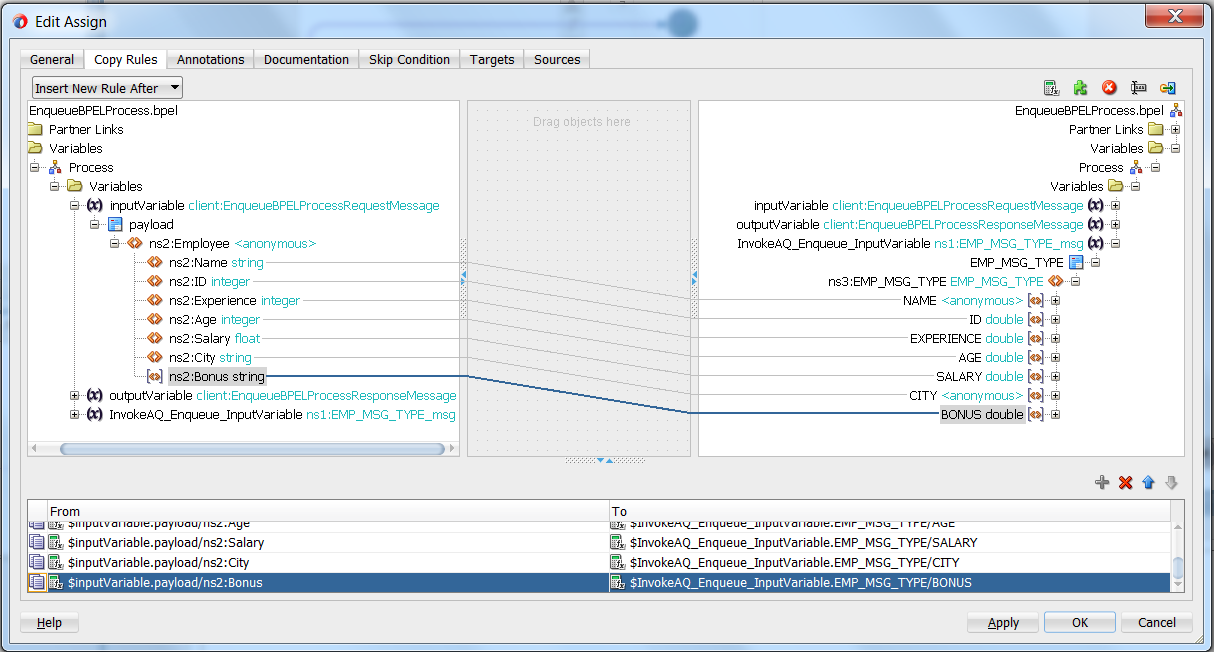
Save the project and deploy it server.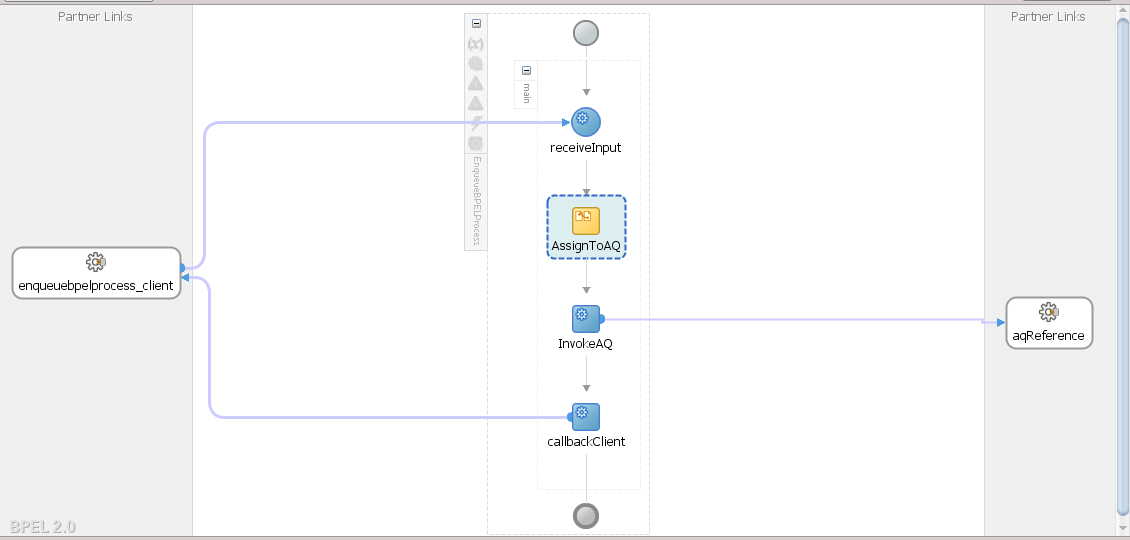
Test this project. Enter all the input values and then check it database. Query your queue table. (select * from system.aq$emp_queue_tab)

Enqueue operation is completed. Now we will see the dequeue operation in SOA in my next article.
 The Humanizer is a platform created by technology domain experts to inspire innovative, hence simple, thoughts for a better social living.


