


In my previous blog,A�I have discussed how to createA�web service from java class. To make this web service available over the network, we need to deploy the web service in the web logic server. Here we will learn how to deploy the web service as a WAR file, the standard approach. First we will create deployment profile and then we will deploy it to WAR. Please follow the below steps to achieve this.
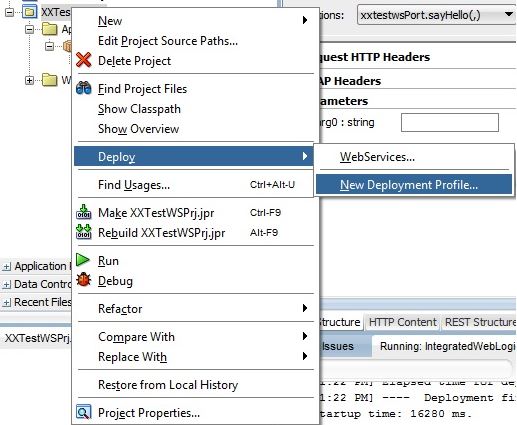
- Create Deployment Profile:A�A�Right click on the project and select Deploy -> New Deployment profile
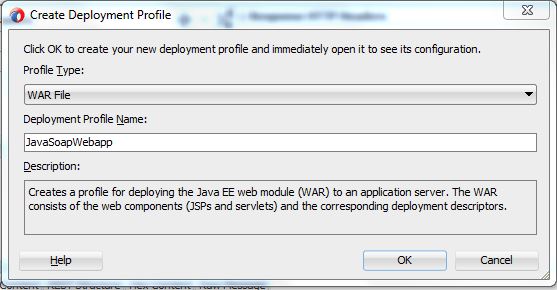
- Select WAR File asA�Profile TypeA�and enter Deployment Profile Name JavaSoapWebapp
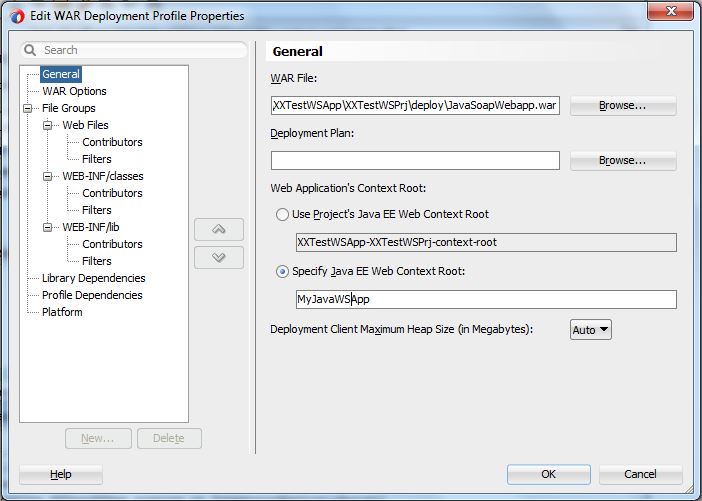
- Click OK and WAR Deployment Profile Properties Editor window will open. Select Specify Java EE Web Context Root option and enter context root name MyJavaWSApp in the text field.
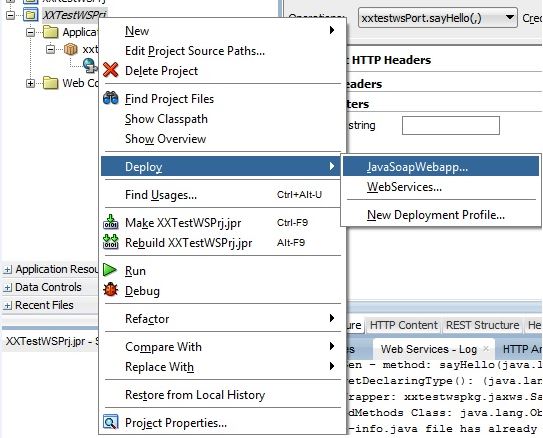
- Click on OK. Again right click on the project and select Deploy -> JavaSoapWebapp
- Select Deploy To WAR
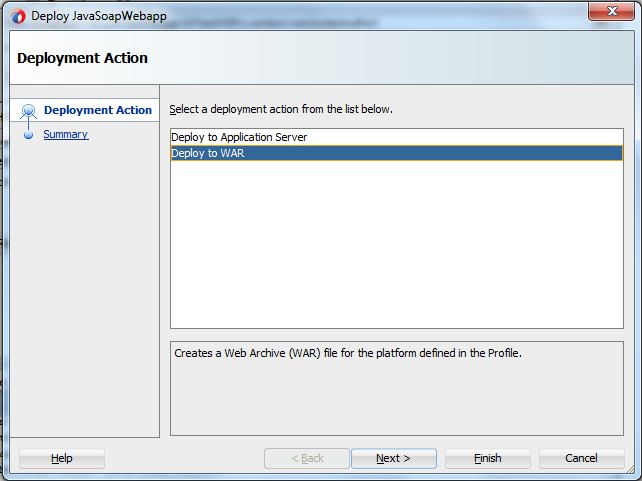
- Click on Next
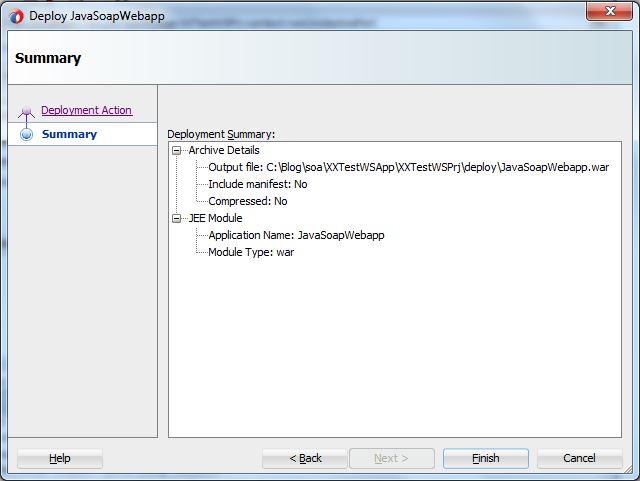
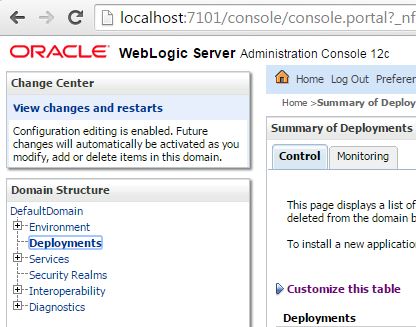
- Click on Finish and WAR file has been created. Login to Administration Console (http://localhost:7101/console) and navigate to Deployments. Please note Host and Port can be different.
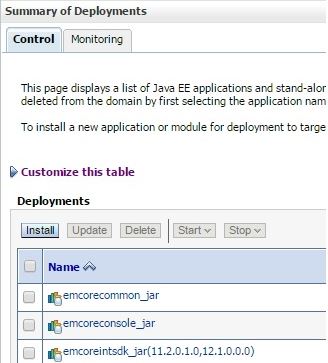
- Click on Install
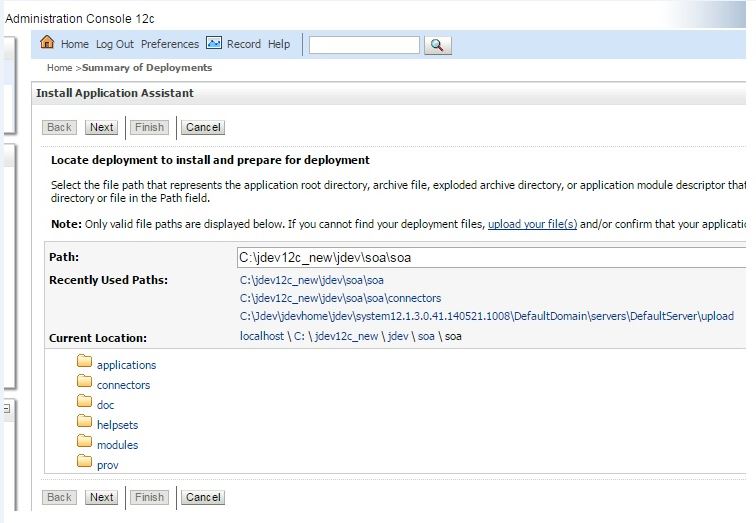
- Click on Next
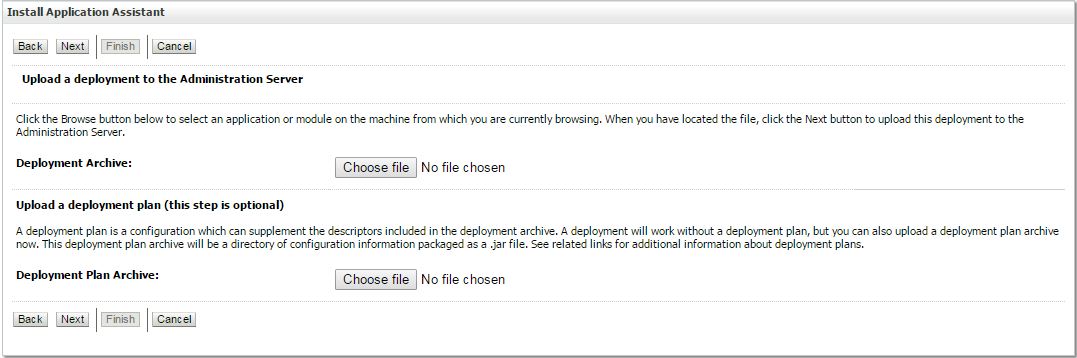
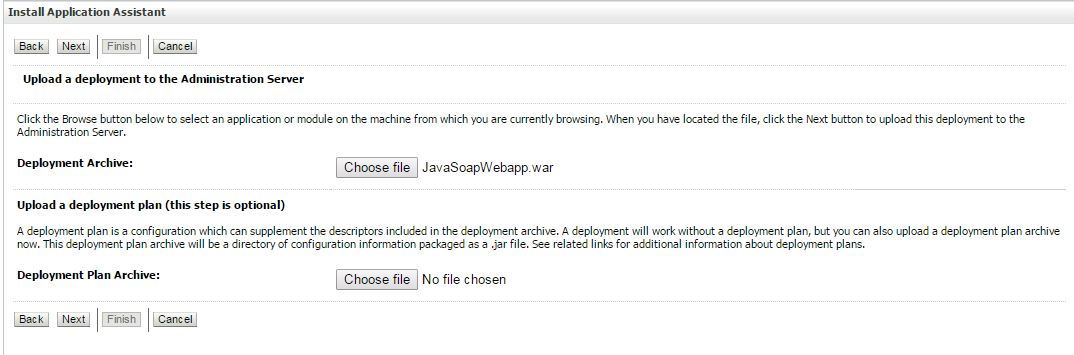
- Upload the war file (JavaSoapWebapp.war) in the Deployment Archive
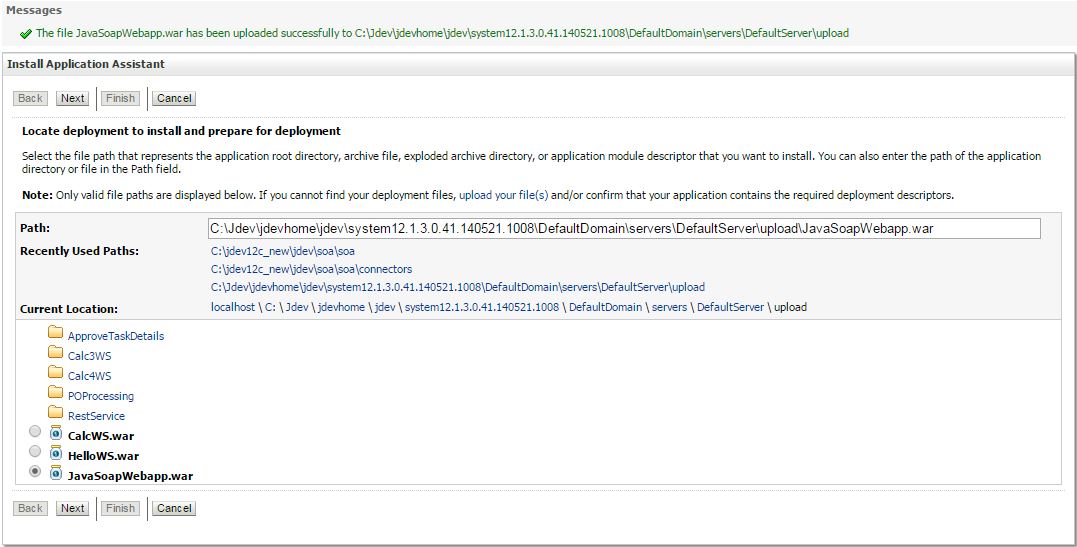
- Click on Next and select the uploaded war file (JavaSoapWebapp.war)
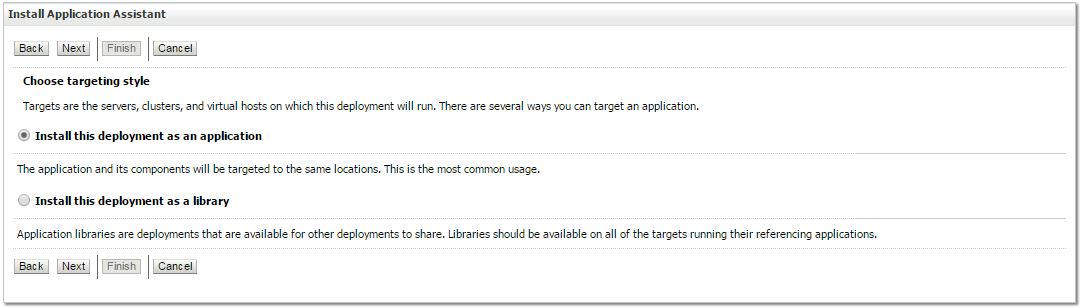
- Choose ‘Install this deployment as an application’A�asA�targeting style
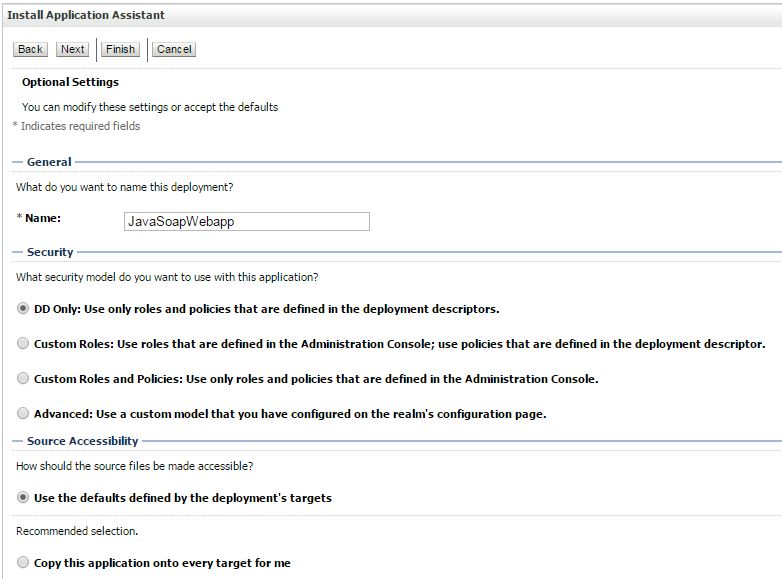
- Enter the name of this deployment and select the other option as shown in the below screenshot
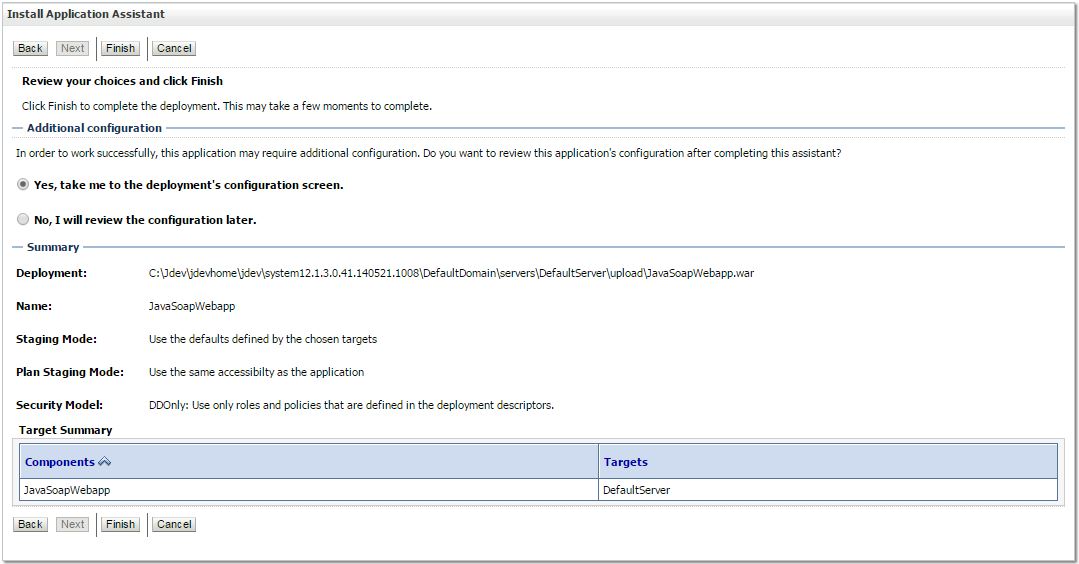
- Click on Next and select the option Yes take me to the deploymenta��s configuration screen
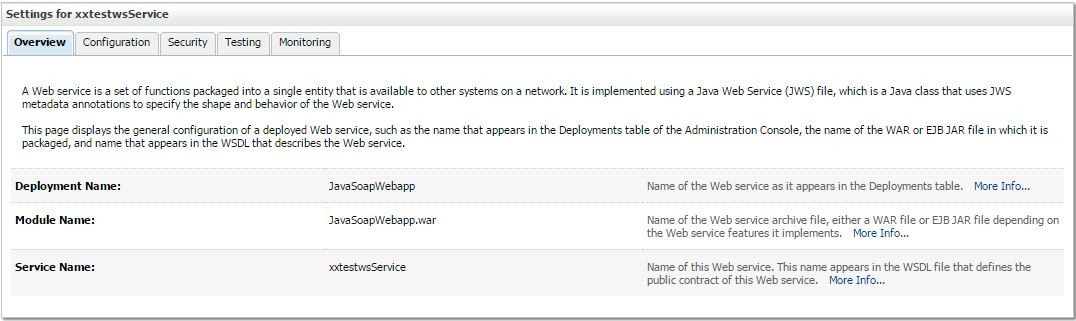
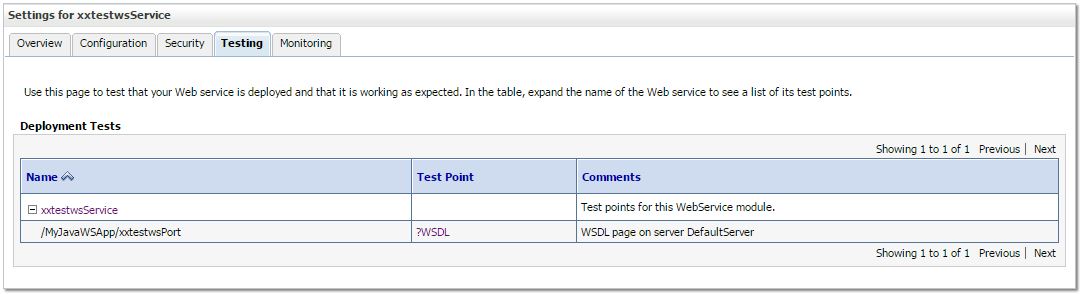
- Again navigate to Deployment and select the web service within the JavaSoapWebapp

- Navigate to Testing tab and user will get the WSDL of this web service
- Test the web service in the SOAP-UI. Copy the address of the WSDL and create a SOAP project in the SOAP-UI
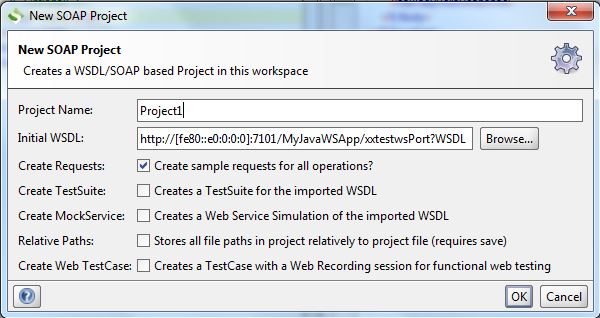
- Click on Request1 and enter arg0 (input parameter)

- Click on green run icon
 in the request part and the response will come as expected.
 The Humanizer is a platform created by technology domain experts to inspire innovative, hence simple, thoughts for a better social living.


