


Introduction
A web service is a collection of standards for exchanging data between applications. The purpose of the service is to provide the facility to its client so that client can access the resources in the system or in the applications. RESTful web service is based on REST (Representational State Transfer) architecture. RESTful web service provides resource representation or access to the resource through JSON and sets of HTTP methods. The following list describes some HTTP methods that are used by REST.
| HTTP Method | Operation | Operation Type |
| GET | Query a resource. | Read Only |
| PUT | Insert a new resource or update if the resource already exists. | Idempotent |
| POST | Update an existing resource. | N/A |
| DELETE | Delete a resource. | Idempotent |
| OPTIONS | List the supported operations on a resource. | Read Only |
| HEAD | Return only the response headers and no response body. | Read Only |
Properties of REST web service
- REST messages are self explaining.
- REST web services are stateless. Every interaction with a resource is stateless. The server does not monitor the status of its client.
- Resource can be identified by URI. The purpose of an URI is to locate the resources on the server hosting the web service.
- Caching is supported.
Advantages of RESTful web service
- REST is a great way of developing lightweight Web services that are easy to implement and maintain.
- It can improve performance by caching web service request results at some point between the service and the consumer.
- Scalability level is high in case of RESTful web service as it is stateless
- Lighter on bandwidth
Difference between SOAP based web service and REST web service
- SOAP is protocol. REST is anA�architectural style.
- SOAPA�requires more bandwidthand resource than REST. RESTA�requires less bandwidthA�and resource than SOAP.
- SOAPA�defines its own security. RESTful web serviceA�inherits security measuresfrom the underlying transport.
- SOAPA�permits XMLdata format only. RESTA�permits differentA�data format such as Plain text, HTML, XML, JSON etc.
Example of RESTful web service
Here I am going to explain how to create RESTful web service from a java class
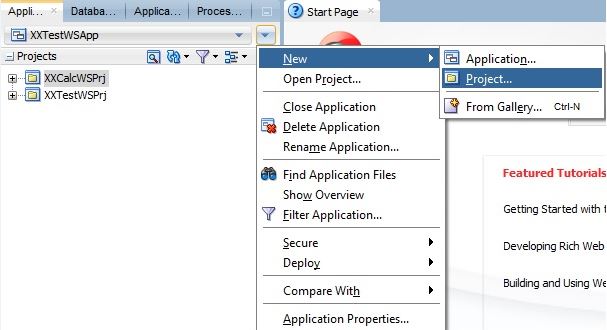
- Create a Project under XXTestWSApp. Right click on the application and select New -> Project
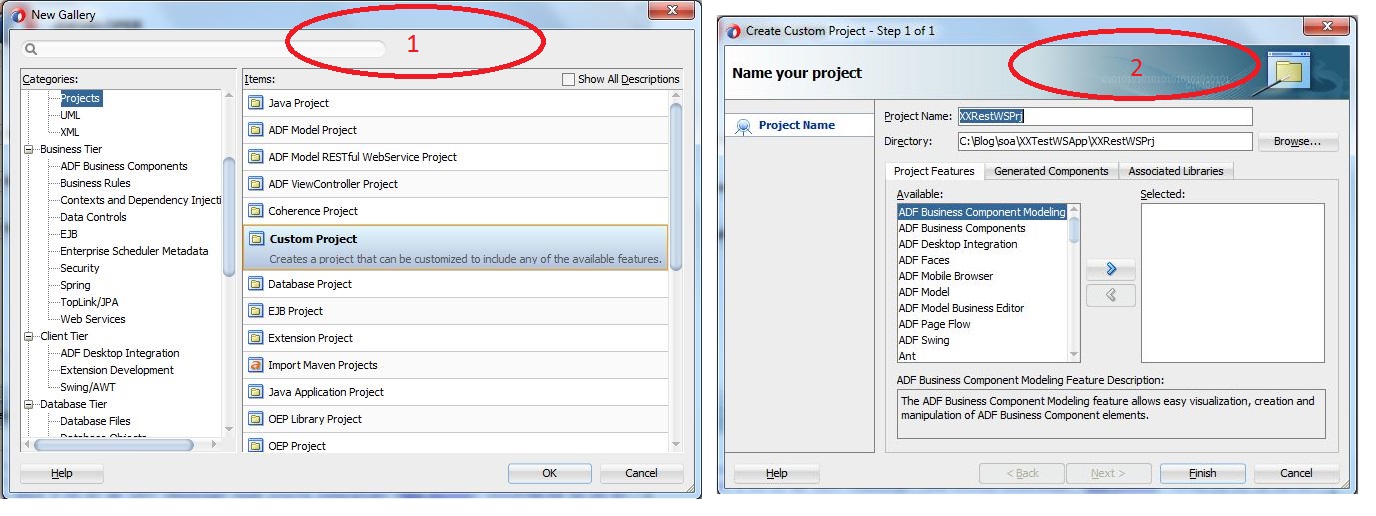
- Select Custom Project under General categories. Enter project name XXRestWSPrj
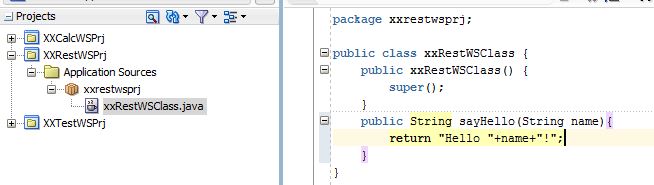
- Create java class. Right click on the project and select java -> class. Enter the details as shown in the below screenshot

-
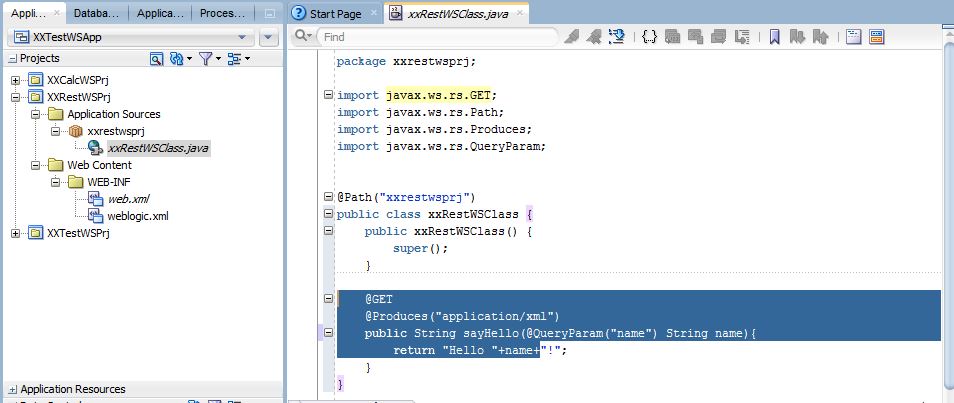
- Enter the below method in the class
public String sayHello(String name){
return “Hello “+name+”!”;
}
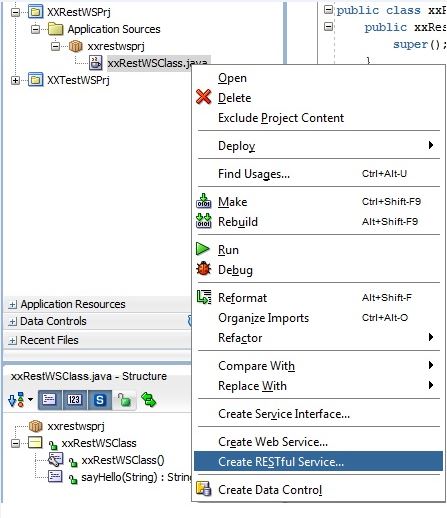
- Right click on the java class and select Create RESTful Service
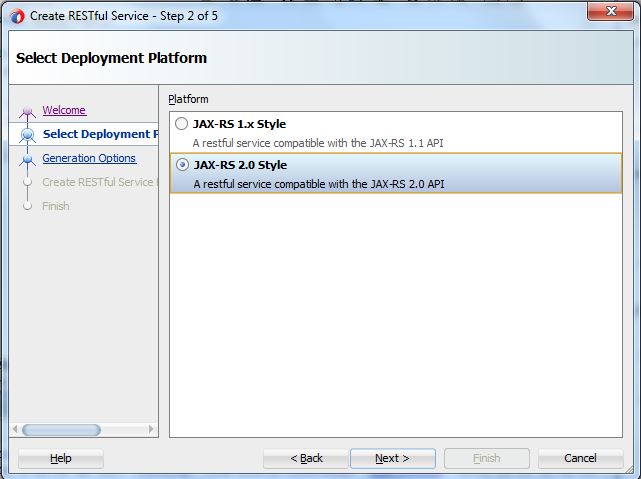
- Select JAX-RS 2.0 Style as Deployment platform
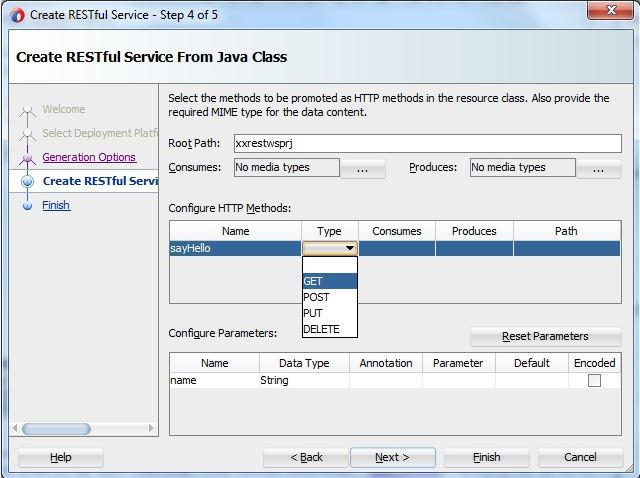
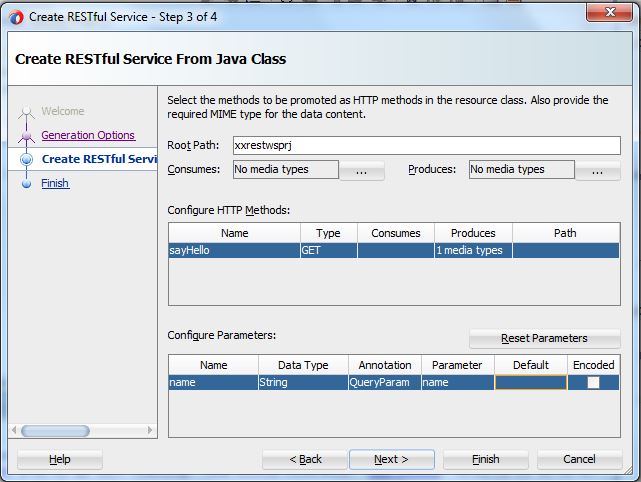
- Configure HTTP method in the next step. Select GET as operation type
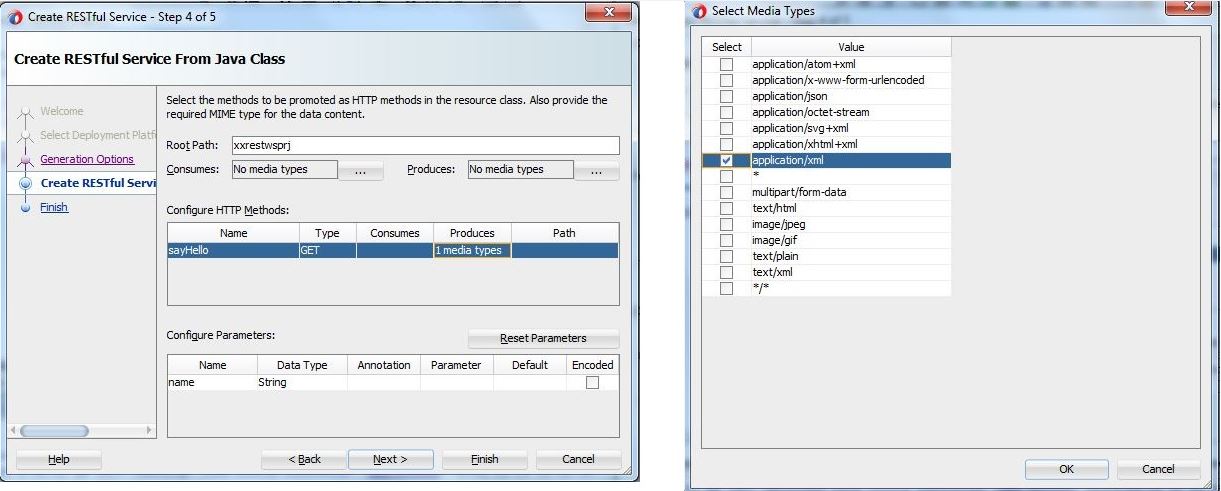
- Select application/xml as Produces
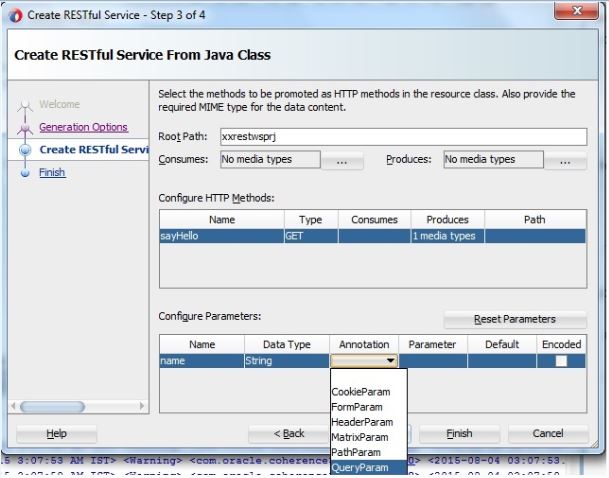
- Select QueryParam as Annotation
- Now HTTP method creation window will look like below screenshot
- Click on Finish and RESTful web service will be created
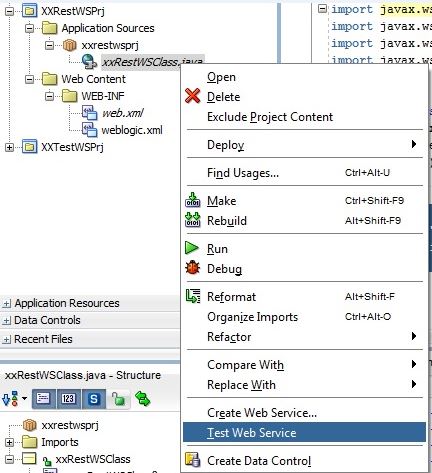
- Right click on java class and select Test Web Service
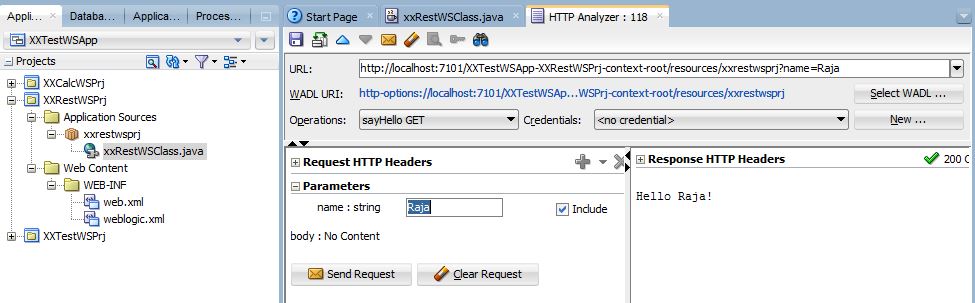
- Enter Raja in the request parameter and click on Send Request. Response will come as expected Hello raja ! You can see afeature of RESTful web service here. Input string is attached in the URL (name=Raja)
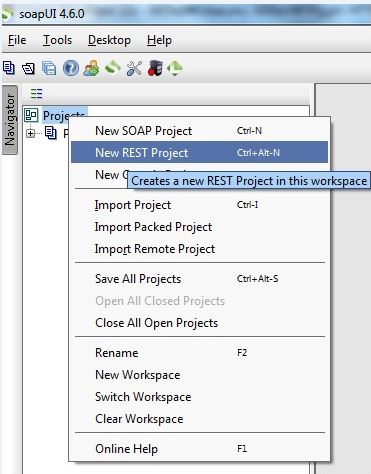
- Try to test this web service in SOAP-UI also. Copy the URL and create a Rest project in the SOAP-UI
- Enter the copied URI and change the input string (name=leena).
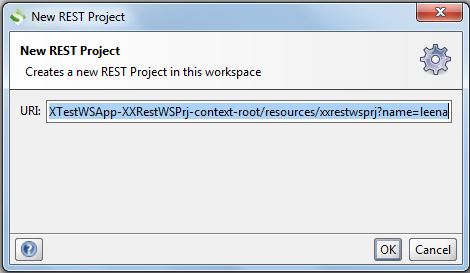
- Now see the magic. Output will be different (Hello leena !). Here resource is identified through URI.

To make this web service available for the user, we need to deploy this project as WAR file. Please refer this link to follow the deployment step.
 The Humanizer is a platform created by technology domain experts to inspire innovative, hence simple, thoughts for a better social living.


